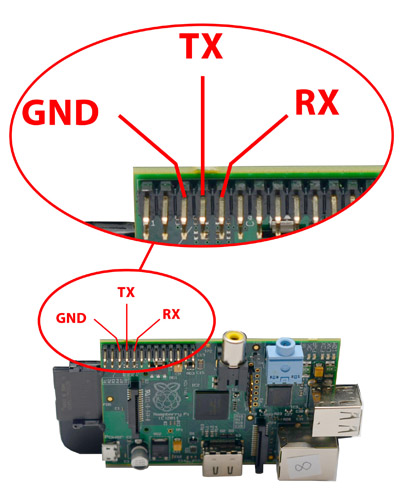
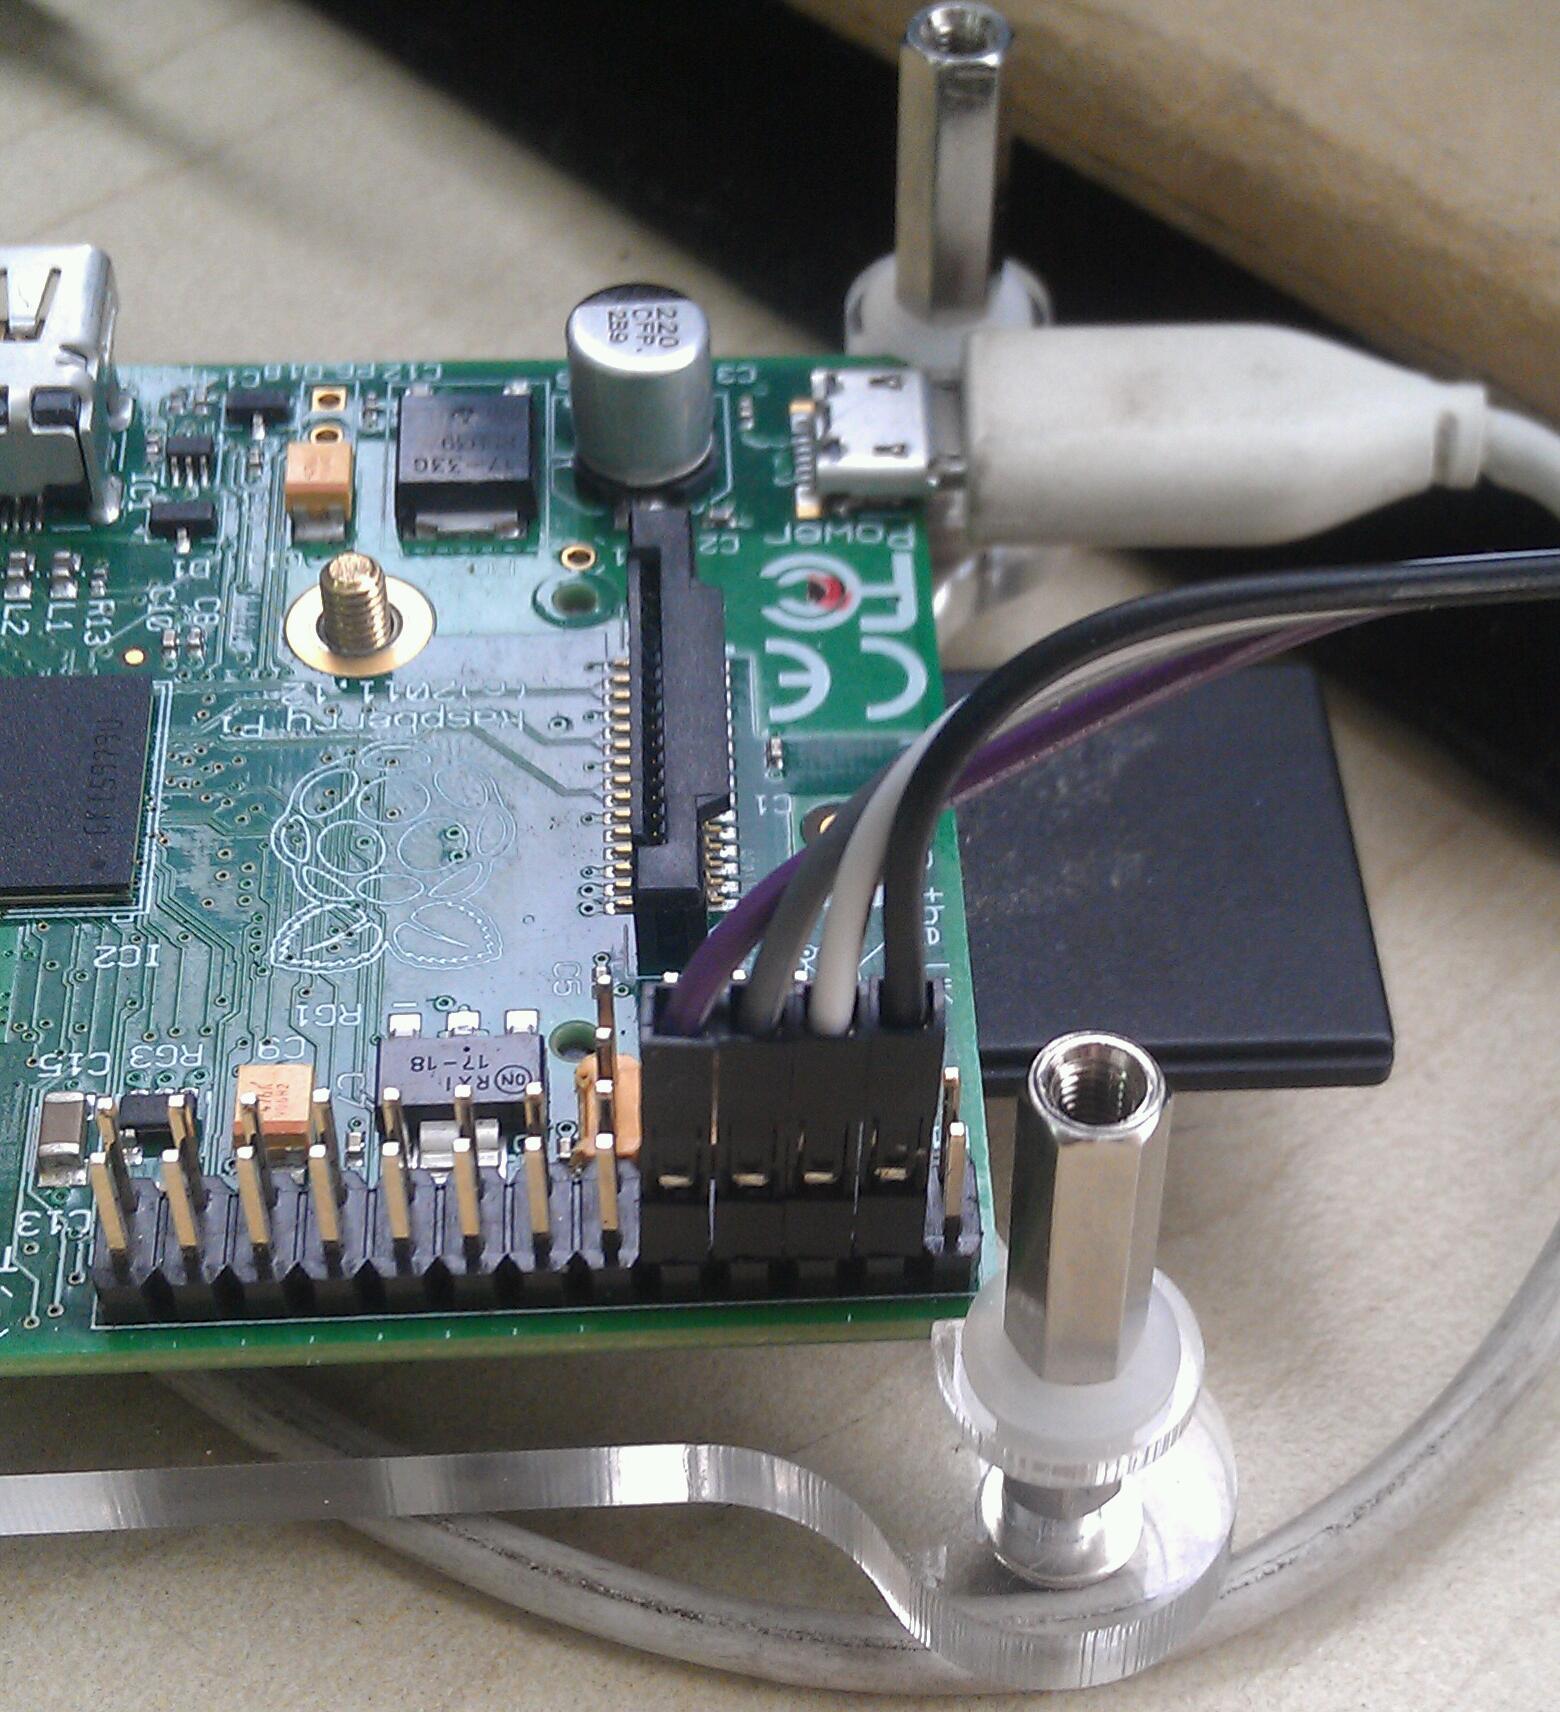
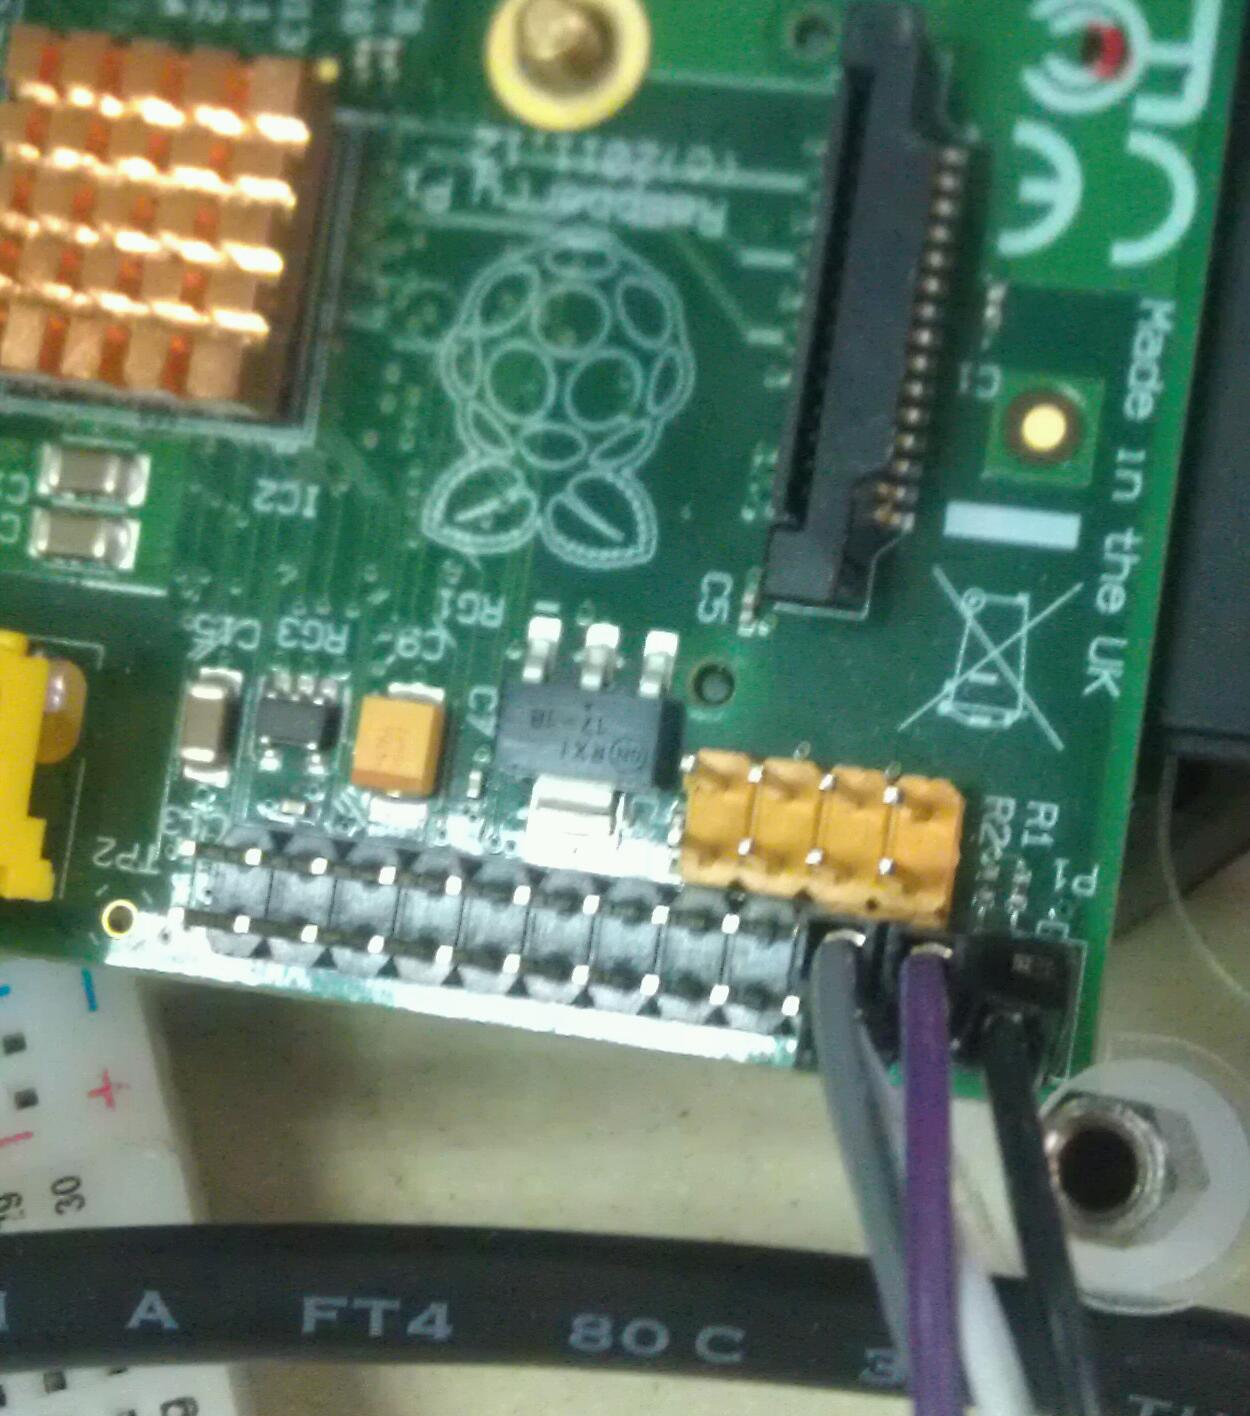
连接线图。
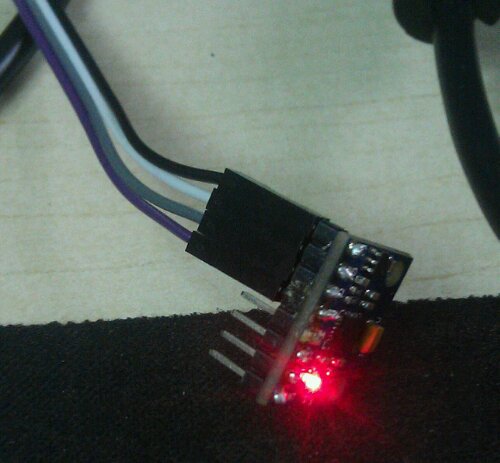
raspberry pi 使用mpu 6050三轴加速度 陀螺仪模块
raspberry pi 使用mpu 6050三轴加速度 陀螺仪模块
安装工具
sudo apt-get install -y python-smbus i2c-tools
编辑文件
$sudo vim /etc/modules
内容如下
i2c-bcm2708
i2c-dev
$vim /etc/modprobe.d/raspi-blacklist.conf
内容如下,直接注释掉
#blacklist spi-bcm2708
#blacklist i2c-bcm2708
测试一下
512M Pi’s use i2c port 1, 256M ones use i2c port 0!
pi@raspberrypi ~ $ sudo i2cdetect -y 1
0 1 2 3 4 5 6 7 8 9 a b c d e f
00: — — — — — — — — — — — — —
10: — — — — — — — — — — — — — — — —
20: — — — — — — — — — — — — — — — —
30: — — — — — — — — — — — — — — — —
40: — — — — — — — — — — — — — — — —
50: — — — — — — — — — — — — — — — —
60: — — — — — — — — 68 — — — — — — —
70: — — — — — — — —
一切正常。地址68在代码中会用到。源码如下。
#! /usr/bin/python
# -*- coding:utf-8 -*-
# Revision:
# Date:        2013-08-16
# Author:      simonzhang
# Email:       simon-zzm@163.com
# Web:         www.simonzhang.net
# -------------------------------

from time import sleep
from math import sqrt, atan

class i2c(object):
    # MPU6050内部地址,需查手册获得
    def __init__(self):
        # raspberry pi A is 0,B is 1
        self.pi = 1
        # iic address of MCP23017
        # 上面测试时候的地址
        self.address = 0x68
        #
        import smbus
        self.bus = smbus.SMBus(self.pi)
        # 电源管理,正常启动接触休眠值0x00
        self.bus.write_byte_data(self.address, 0x6B, 0x00)
        # 陀螺仪采样率,典型值:0x07(125Hz)
        self.bus.write_byte_data(self.address, 0x19, 0x07)
        # 低通滤波频率,典型值:0x06(5Hz)
        self.bus.write_byte_data(self.address, 0x1A, 0x06)
        # 陀螺仪自检及测量范围,典型值:0x18(不自检,2000deg/s)
        self.bus.write_byte_data(self.address, 0x1B, 0x18)
        # 加速计自检、测量范围及高通滤波频率,典型值:0x01(不自检,2G,5Hz)
        self.bus.write_byte_data(self.address, 0x1C, 0x01)
    # 3轴的加速度
    def read_accel(self):
        # x轴
        self.accel_x_h = self.bus.read_byte_data(self.address, 0x3B)
        self.accel_x_l = self.bus.read_byte_data(self.address, 0x3C)
        # y轴
        self.accel_y_h = self.bus.read_byte_data(self.address, 0x3D)
        self.accel_y_l = self.bus.read_byte_data(self.address, 0x3E)
        # z轴
        self.accel_z_h = self.bus.read_byte_data(self.address, 0x3E)
        self.accel_z_l = self.bus.read_byte_data(self.address, 0x3F)
        return self.accel_x_h, self.accel_x_l, \
               self.accel_y_h, self.accel_y_l, \
               self.accel_z_h, self.accel_z_l, \
    # 陀螺仪3轴角加速度,每秒多少度
    def read_gyro(self):
        # x轴角速度
        self.gyro_x_h = self.bus.read_byte_data(self.address, 0x43)
        self.gyro_x_l = self.bus.read_byte_data(self.address, 0x44)
        # y轴角速度
        self.gyro_y_h = self.bus.read_byte_data(self.address, 0x45)
        self.gyro_y_l = self.bus.read_byte_data(self.address, 0x46)
        # z轴角速度
        self.gyro_z_h = self.bus.read_byte_data(self.address, 0x47)
        self.gyro_z_l = self.bus.read_byte_data(self.address, 0x48)
        return self.gyro_x_h, self.gyro_x_l, \
               self.gyro_y_h, self.gyro_y_l, \
               self.gyro_z_h, self.gyro_z_l, \
    # 3轴与自然轴角度,参考他人的算法,也不是很明白
    def read_nature_axle_angle(self):
        # 先开方,然后在算出弧度,最后把弧度转换为角度
        # 使用try 防止分母为0
        # x轴
        tmp = self.accel_x_h/int(sqrt((self.accel_y_h*self.accel_y_h+self.accel_z_h*self.accel_z_h)))
        self.x_nature_axle_angle = int(atan(tmp)*1800/3.14)
        # y轴
        tmp = self.accel_y_h/int(sqrt((self.accel_x_h*self.accel_x_h+self.accel_z_h*self.accel_z_h)))
        self.y_nature_axle_angle = int(atan(tmp)*1800/3.14)
        # z轴
        try:
            tmp = int(sqrt((self.accel_x_h*self.accel_x_h+self.accel_y_h*self.accel_y_h)))/self.accel_z_h
        except:
            pass
        self.z_nature_axle_angle = int(atan(tmp)*1800/3.14)
        return self.x_nature_axle_angle,self.y_nature_axle_angle, self.z_nature_axle_angle
    # 芯片温度
    def read_temp(self):
        self.temp_out_h = self.bus.read_byte_data(self.address, 0x41)
        self.temp_out_l = self.bus.read_byte_data(self.address, 0x42)
        return self.temp_out_h, self.temp_out_l

def main():
    i = i2c()
    while 1:
        print i.read_accel()
        print i.read_gyro()
        print i.read_temp()
        print i.read_nature_axle_angle()
        print "=" * 20
        sleep(0.5)

if __name__ == "__main__":
   main()
因为要在管理员环境下运行。命令如下
sudo python iic_python.py
开始收集测试数据。
测试源码
参考
http://wiki.erazor-zone.de/wiki:linux:python:smbus:doc
http://learn.adafruit.com/adafruits-raspberry-pi-lesson-4-gpio-setup/configuring-i2c
http://blog.sina.com.cn/s/blog_8240cbef01018i10.html
http://www.geek-workshop.com/thread-2328-1-1.html