12月 17

CentOS上使用python和C开发leveldb库学习测试

  测试环境为阿里云,单核Intel(R) Xeon(R) CPU E5-2420 0 @ 1.90GHz,内存512M,最基础的配置,测试系统为CentOS 64位。测试数据就是把双色球所有组合进行排列,共17721088行,文件名为di.txt,体积363421k。leveldb推荐使用SSD硬盘,当前虚拟硬盘的速度肯定是不行,此处只是学习,测试对比。

官方网址
http://code.google.com/p/py-leveldb/

安装命令
svn checkout http://py-leveldb.googlecode.com/svn/trunk/ py-leveldb-read-only
cd py-leveldb-read-only/
# 需要注意,下面的脚本里需要使用git获取leveldb。所以要把git客户端装好。
./compile_leveldb.sh
python setup.py build
python setup.py install

  python遇到的问题
  报错
../snappy-read-only/snappy.h:45:33: error: snappy-stubs-public.h

  解决:
yum -y install autoconf automake libtool
再次编译还是不成功,手动安装压缩工具。
网址:http://code.google.com/p/snappy/
使用命令
wget http://snappy.googlecode.com/files/snappy-1.1.1.tar.gz
./configure –enable-shared=no –enable-static=yes
make CXXFLAGS=’-g -O2 -fPIC’
make install
再次安装编译py-leveldb通过。

  C语言编译问题
  报错
/usr/bin/ld: cannot find -lleveld
collect2: ld 返回 1

  解决
将.so .a拷贝到系统lib目录中,测试系统64位,直接拷贝到lib64中。
cp libleveldb.* /usr/lib64/

python测试部分
顺序写代码

#!/bin/python
#-*- coding:utf-8 -*-
# Filename:  
# Revision:    
# Date:        2013-12-14
# Author:      simonzhang
# web:         www.simonzhang.net
# Email:       simon-zzm@163.com
### END INIT INFO
import leveldb
import time

db = leveldb.LevelDB('./data')

# multiple put/delete applied atomically, and committed to disk 
#batch = leveldb.WriteBatch()
f = open('di.txt')
num = 0
start = time.time()
for i in f:
    if i[-1] == '\n':
        data =  i[:-1]
    else:
        data = i
    num += 1
    db.Put("%s" % num, data)
end = time.time()
print "use sec %s" % (end-start)

批量写代码

#!/bin/python
#-*- coding:utf-8 -*-
# Filename:  
# Revision:    
# Date:        2013-12-14
# Author:      simonzhang
# web:         www.simonzhang.net
# Email:       simon-zzm@163.com
### END INIT INFO
import leveldb
import time

db = leveldb.LevelDB('./data')

batch = leveldb.WriteBatch()
f = open('di.txt')
num = 0
start = time.time()
for i in f:
    if i[-1] == '\n':
        data =  i[:-1]
    else:
        data = i
    num += 1
    batch.Put("%s" % num, data)
    # 因为内存太小,每5万行写入一次
    if ((num % 50000) == 0) or (num == 17721087):
        db.Write(batch, sync = True)
        batch = leveldb.WriteBatch()
end = time.time()
print "use sec %s" % (end-start)

随机读1000万次代码:

#!/bin/python
#-*- coding:utf-8 -*-
# Filename:  
# Revision:    
# Date:        2013-12-14
# Author:      simonzhang
# web:         www.simonzhang.net
# Email:       simon-zzm@163.com
### END INIT INFO
import leveldb
from random import randint
import time

db = leveldb.LevelDB('./data')
start = time.time()
for i in xrange(10000000):
    num = randint(1, 10000000)
    try:
        v =  db.Get("%s" % num)
        print v
    except:
        pass
end = time.time()
print "use sec %s" % (end-start)

测试结果
# python write_seq.py
use sec 329.217786074
每秒写入53827

# python write_bacth.py
use sec 173.626176119
每秒写入102064

# python read.py
use sec 288.070755005
每秒随机读取34713

C部分代码,为了方便,我把两个代码分开写。
C顺序写入

// Filename: 
// Revision:   
// Date:        2013-12-14
// Author:      simonzhang
// web:         www.simonzhang.net
// Email:       simon-zzm@163.com
// END INIT INFO
#include 
#include 
#include 
#include 
#include "leveldb/c.h"

char *itoa(int value, char *string, int radix)
{
    int rt=0;
    if(string==NULL)
        return NULL;
    if(radix<=0 || radix>30)
        return NULL;
    rt = snprintf(string, radix, "%d", value);
    if(rt>radix)
        return NULL;
    string[rt]='\0';
    return string;
}

int main()
{
    leveldb_t *db;
    leveldb_options_t *options;
    leveldb_readoptions_t *roptions;
    char *err = NULL;
    char *read;
    size_t read_len;
    time_t start_time, end_time;
    // write file
    FILE *di;
    if((di=fopen("di.txt","r"))==NULL)
    {
       printf("can't open!\n");
       return -1;
    }
    // OPEN leveldba
    options = leveldb_options_create();
//    leveldb_options_set_error_if_exists(options, 1);
//    leveldb_options_set_cache(options, cache);
//    leveldb_options_set_env(options, env);
//    leveldb_options_set_info_log(options, NULL);
//    leveldb_options_set_write_buffer_size(options, 100000);
//    leveldb_options_set_paranoid_checks(options, 1);
//    leveldb_options_set_max_open_files(options, 4096);
//    leveldb_options_set_block_size(options, 1024);
//    leveldb_options_set_block_restart_interval(options, 8);
//    leveldb_options_set_compression(options, leveldb_no_compression);
    leveldb_options_set_compression(options, leveldb_snappy_compression);
    leveldb_options_set_create_if_missing(options, 1);
    db = leveldb_open(options, "data", &err);

    if (err != NULL) {
      fprintf(stderr, "Open fail.\n");
      return(1);
    }
    leveldb_free(err);
    err = NULL;
    roptions = leveldb_readoptions_create();
    // start read
    start_time = time(NULL);
    int X=99,Y=15000000; //X为起始值 Y为终止值
    int _rand;//随机数
    char s[8];
    srand( (unsigned)time( NULL ) );
    for (int i = 0; i<10000000; i++)
    {
       _rand = rand()%(Y-X+1)+X;
       itoa(_rand,s,8);
       read = leveldb_get(db, roptions, s, strlen(s), &read_len, &err);
       //printf("%s\n", read);
       if (err != NULL) {
           fprintf(stderr, "Read fail.\n");
           return(1);
         }
        leveldb_free(err);
        free(read);
    }
    // CLOSE`
    leveldb_close(db);
    end_time = time(NULL);
    printf("%ld\n", end_time-start_time);
    return 0;
}

C 1000万次随机读

// Filename: 
// Revision:   
// Date:        2013-12-14
// Author:      simonzhang
// web:         www.simonzhang.net
// Email:       simon-zzm@163.com
// END INIT INFO
#include 
#include 
#include 
#include 
#include "leveldb/c.h"

char *itoa(int value, char *string, int radix)
{
    int rt=0;
    if(string==NULL)
        return NULL;
    if(radix<=0 || radix>30)
        return NULL;
    rt = snprintf(string, radix, "%d", value);
    if(rt>radix)
        return NULL;
    string[rt]='\0';
    return string;
}

int main()
{
    leveldb_t *db;
    leveldb_options_t *options;
    leveldb_writeoptions_t *woptions;
    char *err = NULL;
    time_t start_time, end_time;
    // write file
    FILE *di;
    if((di=fopen("di.txt","r"))==NULL)
    {
       printf("can't open!\n");
       return -1;
    }
    // OPEN leveldba
    options = leveldb_options_create();
//    leveldb_options_set_error_if_exists(options, 1);
//    leveldb_options_set_cache(options, cache);
//    leveldb_options_set_env(options, env);
//    leveldb_options_set_info_log(options, NULL);
//    leveldb_options_set_write_buffer_size(options, 100000);
//    leveldb_options_set_paranoid_checks(options, 1);
//    leveldb_options_set_max_open_files(options, 4096);
//    leveldb_options_set_block_size(options, 1024);
//    leveldb_options_set_block_restart_interval(options, 8);
//    leveldb_options_set_compression(options, leveldb_no_compression);
    leveldb_options_set_compression(options, leveldb_snappy_compression);
    leveldb_options_set_create_if_missing(options, 1);
    db = leveldb_open(options, "data", &err);

    if (err != NULL) {
      fprintf(stderr, "Open fail.\n");
      return(1);
    }
    leveldb_free(err);
    err = NULL;
    woptions = leveldb_writeoptions_create();
    // start write  
    start_time = time(NULL);
    char ch, str[30];
    int num=0, c=0;
    ch = fgetc(di);
    while(ch!=EOF)
    {
        if (ch == '\n') 
        {
            char s[10];
            itoa(num,s,10);
            leveldb_put(db, woptions, s, strlen(s), str, strlen(str), &err);
            if (err != NULL) {
                fprintf(stderr, "Write fail.\n");
                return(1);
            }
            memset(str,'\0',sizeof(str));
            c = 0;
            num += 1;
        }
        else
        {
            str[c] = ch;
            c += 1;
        }
        ch = fgetc(di);
    }
    fclose(di);
    // CLOSE
    leveldb_close(db);
    end_time = time(NULL);
    printf("%ld\n", end_time-start_time);
    return 0;
}

测试
C顺序写入
编译
gcc -Wall -std=c99 write-leveldb.c -lleveldb -O3 -o write-leveldb
结果
# ./write-leveldb
225
每秒钟处理78760

C 1000万次随机读
编译
gcc -Wall -std=c99 read-leveldb.c -lleveldb -O3 -o read-leveldb
结果
# ./read-leveldb
143
每秒处理69930

  写入过程CPU肯定是全部跑满。使用snappy压缩,所以写入data目录为175M,压缩了一半。
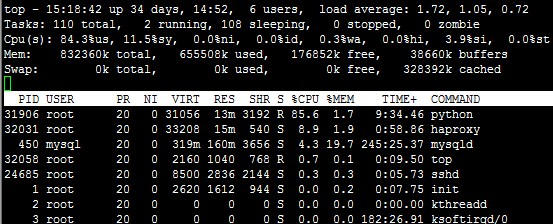
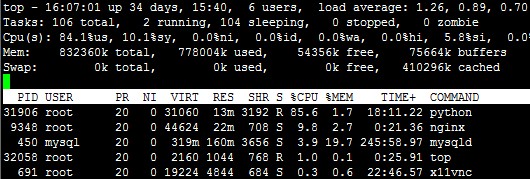
  随机读将CPU跑满。python内存占用23%。C语言占用内存最终增加到39%。
  之后又做到了一个测试,硬件内存只有512M,硬盘数据插入826M。使用python代码再次随机读取1000万次,使用347.94秒,每秒随机读28740。所以数据超出物理内存不会出错只是速度下降。
  还有问题一没有测试,leveldb默认的每块2M如果64G则数据文件65536个,达到系统打开文件最大数,不知道会不会出问题。并且在同一个目录下文件过多也会对系统改造成一定压力,不知道是否会有影响。推荐使用办法把单块体积加大,此效率也没有测试。
  还有一点说明,使用pypy做了测试,效果不如python,具体原因没有详查。

12月 04

python和C统计jpeg图片RGB值的效率

  测试硬件pcduino(arm),操作系统ubuntu 3.4.29+ armv7l GNU/Linux。测试文件,图片jpeg,大约1.3M。测试内容统计图片的RGB里的值,存在数据库里将来看看能不能做搜索用。
  先是用python,开发速度非常快,但是效率有点问题,所以有用C做了一下。以下是代码和两次的测试结果。C使用的jpeglib库8.0版本。

python代码

#!/bin/python
#-*- coding:utf-8 -*-
# Filename:   
# Revision:    1.0
# Date:        2013-12-04
# Author:      simonzhang
# web:         www.simonzhang.net
# Email:       simon-zzm@163.com
### END INIT INFO
from PIL import Image
# 对RGB简历字典
R = {}
G = {}
B = {}
# 初始化值
for i in xrange(256):
    R[i] = 0
    G[i] = 0
    B[i] = 0
# 大图片需要处理很长时间,所以要用python可以按比例将图缩小
a = Image.open('123.jpg')
#a = a.resize((int(a.size[0] * 0.1), int(a.size[1] * 0.1)), Image.ANTIALIAS)
x = a.size[0]
y = a.size[1]

# 循环处理每个像素点的RGB值
for lx in xrange(x):
    for ly in xrange(y):
        rgb = a.getpixel((lx, ly))
        R[rgb[0]] += 1
        G[rgb[1]] += 1
        B[rgb[2]] += 1
# 打印最终结果
print sorted(R.items(), key=lambda R:R[1],reverse=True)[0]
print sorted(G.items(), key=lambda G:G[1],reverse=True)[0]
print sorted(B.items(), key=lambda B:B[1],reverse=True)[0] 

C代码

/*
*Filename:   
* Revision:    1.0
* Date:        2013-12-04
* Author:      simonzhang
* web:         www.simonzhang.net
* Email:       simon-zzm@163.com
*/
#include 
#include 
#include 

/* we will be using this uninitialized pointer later to store raw, uncompressd image */
//unsigned char *raw_image = NULL;
/* */
int max_num;

/* find max values*/
int sort_values(int arr[255])
{
    int largest1, largest2, temp;
    max_num = 0;
    largest1 = arr[0];
    largest2 = arr[1];
    if (largest1 < largest2)
    {
        temp = largest1;
        largest1 = largest2;
        largest2 = temp;
    }
    int i;
    for (i = 2; i < 255; i++)
    {
        if (arr[i] >= largest1)
        {
            largest2 = largest1;
            largest1 = arr[i];
            max_num = i;
        }
        else if (arr[i] > largest2)
        {
            largest2 = arr[i];
        }
    }
    return largest1;
}


read_jpeg_file(char *filename)
{
    /* these are standard libjpeg structures for reading(decompression) */
    struct jpeg_decompress_struct cinfo;
    struct jpeg_error_mgr jerr;
    /* libjpeg data structure for storing one row, that is, scanline of an image */
    JSAMPROW row_pointer[1];
    FILE *infile = fopen( filename, "rb" );
    unsigned long location = 0;
    int i = 0;
    if ( !infile )
    {
        printf("Error opening jpeg file %s\n!", filename );
        return -1;
    }
    /* here we set up the standard libjpeg error handler */
    cinfo.err = jpeg_std_error( &jerr );
    /* setup decompression process and source, then read JPEG header */
    jpeg_create_decompress( &cinfo );
    /* this makes the library read from infile */
    jpeg_stdio_src( &cinfo, infile );
    /* reading the image header which contains image information */
    jpeg_read_header( &cinfo, TRUE );
    /* Uncomment the following to output image information, if needed. */
    /* Start decompression jpeg here */
    jpeg_start_decompress( &cinfo );
    /* allocate memory to hold the uncompressed image */
    //raw_image = (unsigned char*)malloc( cinfo.output_width*cinfo.output_height*cinfo.num_components );
    /* now actually read the jpeg into the raw buffer */
    row_pointer[0] = (unsigned char *)malloc( cinfo.output_width*cinfo.num_components );
    /* read one scan line at a time */
    int r[255], g[255], b[255];
    for(i=0;i<255;i++)
    {
        r[i] = 0;
        g[i] = 0;
        b[i] = 0;
    }
    while( cinfo.output_scanline < cinfo.image_height )
    {
        jpeg_read_scanlines( &cinfo, row_pointer, 1 );
        for( i=0; i

先是测试python部分
#time python countrgb.py

(12, 510858)
(17, 429677)
(9, 662996)

real 11m4.009s
user 10m42.200s
sys 0m1.090s

开始测试C的部分
首先优化编译一下
#gcc countrgb.c -l jpeg -O3 -o countrgb
#time ./countrgb 123.jpg
12,510858
17,429677
9,662996

real 0m0.750s
user 0m0.730s
sys 0m0.010s

  两次统计结果相同,说明统计方法没有问题。python用了11分钟,C用了0.75秒,看来真的不是一般的快了。C代码编译后的文件8K,静态编译500多K。不过我是喜欢用python,开发速度快,结构清晰。

11月 19

pcduino对比测试nginx和haproxy的负载效果

  在pcduino上对比haproxy和nginx的负载效果

  安装haproxy
  下载地址
http://www.haproxy.org/download/1.4/src/haproxy-1.4.24.tar.gz

  安装如下
make TARGET=linux26 ARCH=arm PREFIX=/program/haproxy
make install PREFIX=/program/haproxy

配置如下:

global
        log 192.168.1.132   local0
        #log 127.0.0.1  local1 notice
        #log loghost    local0 info
        maxconn 4096
        chroot /program/haproxy
        uid 0                          #所属运行的用户uid
        gid 0                         #所属运行的用户组
        daemon
        nbproc 1
        pidfile /program/haproxy/run/haproxy.pid
        #debug
        #quiet

defaults
        log     global
        log     192.168.1.132       local3        #日志文件的输出定向
        mode    http                            #所处理的类别
        option  httplog                        #日志类别
        option  httpclose
        option  dontlognull
        option  forwardfor
        option  redispatch
        retries 2                      #设置多个haproxy并发进程提高性能
        maxconn 2000
        balance roundrobin                     #负载均衡算法
        stats   uri     /haproxy-stats        #haproxy 监控页面的访问地址
        # 可通过 http://localhost:1080/haproxy-stats 访问
        contimeout      5000
        clitimeout      50000
        srvtimeout      50000

listen  localhost 0.0.0.0:1080                   #运行的端口及主机名
        mode    http
        option  httpchk GET /           #健康检测地址
        server  s1 192.168.1.132:9900 weight 3 check
        server  s2 192.168.1.80:8880 weight 3 check

简单操作如下:
启动服务:
# /program/haproxy/sbin/haproxy -f /program/haproxy/haproxy.cfg

重启服务:
# /program/haproxy/sbin/haproxy -f /program/haproxy/haproxy.cfg -st `cat /program/haproxy/logs/haproxy.pid` (没有换行)

停止服务:
# killall haproxy

#./haproxy -h 说明
-v 屏蔽版本
-vv 编译选项
-V 版本
-d 前台,debug模式
-db 屏蔽后台模式
-D daemon模式启动
-q 安静模式,不输出信息
-c 对配置文件进行语法检查
-s 显示统计数据
-l 显示详细统计数据
-ds 不使用speculative epoll
-de 不使用epoll
-dp 不使用poll
-sf 程序启动后向pidlist里的进程发送FINISH信号,这个参数放在命令行的最后
-st 程序启动后向pidlist里的进程发送TERMINATE信号,这个参数放在命令行的最后

  安装nginx
  下载地址
http://nginx.org/download/nginx-1.5.6.tar.gz
  首先安装pcre。
ftp://ftp.csx.cam.ac.uk/pub/software/programming/pcre/pcre-8.33.tar.gz
然后是configure、make、make install。
最后做个软连接。
ln -s /usr/local/lib/libpcre.so.1 /usr/lib/

  开始安装nginx编译参数如下
./configure –prefix=/program/nginx –user=root –group=root –with-pcre –with-select_module –with-poll_module –with-http_stub_status_module –with-http_ssl_module –with-http_realip_module –with-http_gzip_static_module
配置如下

user  root root;
worker_processes 1;
pid        logs/nginx.pid;
events {
    use epoll;
    worker_connections  5120;
}

http {
    include       mime.types;
    default_type  application/octet-stream;
    server_tokens off;
    log_format  main  '$remote_addr - $remote_user [$time_local] "$request" '
                      '$status $body_bytes_sent "$http_referer" '
                      '"$http_user_agent" "$http_x_forwarded_for" "$request_time" '
                      '"$upstream_cache_status"';
    access_log  logs/access.log  main ;
    sendfile        on;
    keepalive_timeout  120;
    tcp_nodelay on;
    tcp_nopush on;
    client_header_buffer_size 128k;
    large_client_header_buffers 4 64k;
    reset_timedout_connection on;
    proxy_ignore_client_abort on;
   ######################################
   upstream  deploy_tool {
            server 192.168.1.132:9900;
       }
   server {
        listen       80;
        server_name 192.168.1.132;
        location / {
        proxy_pass_header      Server;
        proxy_redirect          off;
        proxy_set_header        X-Real-IP $remote_addr;
        proxy_set_header        X-Forwarded-For $proxy_add_x_forwarded_for;
        proxy_set_header        Host $http_host;
        client_max_body_size   150m;
        proxy_connect_timeout  2000;
        proxy_send_timeout     2000;
        proxy_read_timeout     300;
        access_log off;
        proxy_pass              http://deploy_tool;
        }
        location /status {
             stub_status on;
             access_log  off;
             auth_basic_user_file    /lnmp/nginx/conf/htpasswd;
        }
     }
}

  WEB项目使用我的部署工具,只是连接到首页。python使用2.7。压力工具就是写了用urllib2多线程获取页面的代码,并发150个。测试结果如下:
haproxy:
haproxystatus
ubuntu
nginx:
nginxstatus
ubuntu-nginx

结论:
  如果只是简单反向连接,两者效率差不多。haproxy后端检测效果不错,对长连接的处理也很好,可做mysql等其他服务器的负载工作。nginx有更强大的模块,如缓存、uwsgi等功能一起用,nginx就方便了很多。以后WEB的服务使用nginx,其它需要负载的使用haproxy。

10月 15

无聊的内存操作

  今天一哥们说他内存曲线是均匀锯齿状。这对python太简单了,就是对内存添写和释放就行。我无聊之下写了下面的代码。

import StringIO
import time

for i in range(100):
    context = a * 2048 * 100000
    a=StringIO.StringIO(context)
    time.sleep(2)
    a.close()
    context = b * 1024 * 10
    a=StringIO.StringIO(context)
    time.sleep(1)
    a.close()

内存图形如下:
内存图形